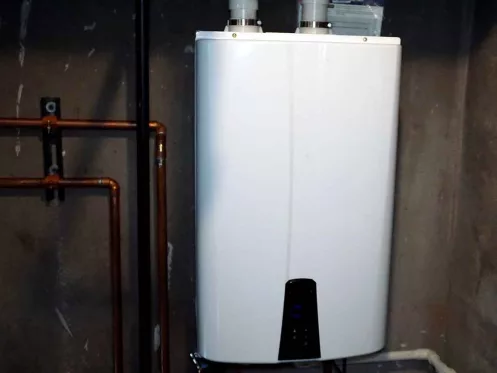
How to Flush a Tankless Water Heater
Having a tankless water heater is a fantastic way to enjoy endless hot water and energy efficiency. However, to ensure its optimal performance and longevity, regular maintenance is crucial. One essential maintenance task for tankless water heaters is flushing the system. Flushing helps remove mineral deposits, sediment, and debris that may accumulate over time, ensuring your heater operates at peak efficiency. In this blog post, Sierra Air Conditioning & Plumbing brings you a step-by-step guide on how to flush your tankless water heater, keeping it running smoothly for years to come.
Step 1: Gather Your Tools
Before starting the flushing process, ensure you have the necessary tools at hand. You will need a bucket, a submersible pump (small utility pump), a couple of hoses, vinegar, and a screwdriver. Make sure the tankless water heater is disconnected from the power supply and the gas source before proceeding.
Step 2: Shut Off the Water Supply
Locate the cold water isolation valve, typically found on the incoming water pipe connected to the heater. Shut off this valve to stop the water supply to the tankless water heater. If you’re unsure about which valve to turn off, consult your user manual or seek professional assistance from Sierra Air Conditioning & Plumbing.
Step 3: Remove the Purge Port Valves
Find the purge port valves on your tankless water heater. These valves are usually located on the cold water inlet and hot water outlet. Use a screwdriver to remove them carefully.
Step 4: Connect the Hoses
Attach one end of a hose to the cold water isolation valve and the other end to the submersible pump. Connect another hose to the hot water isolation valve and the submersible pump.
Step 5: Place the Submersible Pump
Submerge the pump in a bucket filled with a solution of equal parts white vinegar and water. The vinegar will help dissolve mineral deposits and scale inside the heater, ensuring efficient operation.
Step 6: Turn On the Pump
Switch on the submersible pump, and let the solution circulate through the tankless water heater for at least 30 minutes. The circulation will dislodge and remove any accumulated debris and mineral buildup.
Step 7: Rinse the System
After the flushing process, turn off the submersible pump and disconnect it from the power supply. Remove the hoses and reattach the purge port valves to their original positions. Open the cold water isolation valve and let water flow through the heater for a few minutes to rinse out any remaining vinegar solution.
Step 8: Check for Leaks
Inspect the tankless water heater and the surrounding pipes for any leaks. If you notice any leaks, contact Sierra Air Conditioning & Plumbing immediately to address the issue before proceeding.
Step 9: Restore Power and Gas Supply
Once you’ve ensured there are no leaks, restore power to the tankless water heater and reconnect the gas supply. Your tankless water heater should now be clean and ready to provide you with continuous hot water.
Conclusion: Flushing a Tankless Water Heater
Flushing your tankless water heater is a crucial maintenance task that should be performed at least once a year to keep it operating efficiently. By following this step-by-step guide provided by Sierra Air Conditioning & Plumbing, you can ensure your tankless water heater continues to deliver hot water on demand for many years to come. Remember, if you ever encounter any difficulties during the flushing process or if you’re unsure about performing the maintenance yourself, don’t hesitate to reach out to Sierra Air Conditioning & Plumbing for professional assistance.


